
Hey everyone when you will start to create a large project, the project take a time, so, you need to display countdown timmer that are display the time period that you’ve added to lunch the webiste, project etc. So, I’m going to teach with you How to Create a Coming Soon Website in HTML CSS and Also JavaScript.
guys we are using HTMl, CSS and Also JavaScript to create a attractive and professional comming soon website. Inside there you will able to see the days, hours, minutes and also seconds. The time period is running continuesly when it’s complete the duration that you’ve used to create a comming soon website.
Facing a deadline and need to create a Coming Soon page quickly? You’re in the right place. This article will show you how to make an engaging and professional Coming Soon website using HTML in 6 easy steps. Get ready to launch your project with confidence.
The purpose of a coming soon website is to generate interest in your upcoming business or product. A well-crafted coming soon page encourages visitors to stay interested in your project and provide important information about it. It’s a great way to notify the public about something new coming up, and provides a platform for visitors to share their thoughts and feedback as well.
Creating an effective coming soon website involves more than just throwing up some visuals. If done properly, a cleverly-designed coming soon page can be used to build anticipation, capture potential customers’ contact information, increase brand awareness, and drive traffic back when the actual launch is ready.
How to Create a Coming Soon Website in HTML
Before we dive into building a basic “coming soon” webpage using HTML, it’s important to understand the common elements that are present on these types of pages. The first step should be deciding what these elements should include before getting started with the development process. Common elements typically found on ‘coming soon pages’ are:
- Headings and Subheadings
- Sign Up Form
- Introduction Content
- Visuals (e.g images/videos)
- Launch Countdown Timer
- Social Media Links/Buttons
Setting Up the HTML File
Setting up the HTML file for your coming soon website is the foundation of your project. A basic coming soon HTML page includes all of the basic elements to create a functioning website, such as the document type, meta tags, headings, title and content.
The following are the basic steps to help you create a standard HTML page for your coming soon web page:
1. Begin with setting up the at the top of your code. This is crucial for informing browsers as to which version of HTML you’re using for your code.
2. Then add inandmeta-elements to provide details about what content will appear in the browser tab or window. Remember that title should include only 70 characters and should be relevant to topic or product associated with the webpage.
3. Next, add in tag into your code interval; this tag specifies who wrote this specific document’s programming code but won’t be seen by visitors on actual webpages’ viewport(s). Simply enter in “Your Company Name” or “Your Name” within this tag’s field — so that search engines can know it more about who originally coded it up directly.
4. Following these items, add other necessary meta-elements regarding with charset(s) used within coding system i.e UTF-8 encoding as well set initial viewport scale/zoom levels while mobile device user viewing such content inside mobile applications/browsers respectively beforehand also if fairly doable/possible already out there within current state..
5. And lastly all important setup elements within head[] region before, enter all needed stylesheet file importance calls & JavaScript sourced programs references within respective subsections like below:
>Link rel =”stylesheet”,href=”styleSheetName”;
>script SRC =”PathToJavaScriptFile”;
Designing the Coming Soon Page
To create a coming soon page, the first step is to design the page itself. This should be fairly straightforward, depending on the particulars of your website. If you have an existing website, you will probably want the coming soon page to match its style. Consider including elements such as colors, logos and fonts that are found on your homepage and other existing pages so that visitors can instantly recognize it as part of your brand.
Be sure to include an attractive headline that informs visitors about the upcoming launch so that they know what to expect and (hopefully) keep checking back for more information. You may also want to include additional information about your website or product — such as who it’s for, what it offers, etc. — in order to build anticipation and excitement among visitors who discover your site early on.
Including images or videos can be a great way to spark interest, as well – many websites opt for a photo or video-based background since it’s often eye-catching enough to draw attention even before any text is read. However, be careful not to make any visuals too distracting – this should still be a “coming soon” page after all!
<!DOCTYPE html>
<html lang="en">
<head>
<meta charset="UTF-8" />
<meta http-equiv="X-UA-Compatible" content="IE=edge" />
<meta name="viewport" content="width=device-width, initial-scale=1.0" />
<title>Responsive Comming Soon Website Using HTML, CSS & JS</title>
<link rel="stylesheet" href="css/style.css" />
</head>
<body>
<header>
<div class="out_side_content">
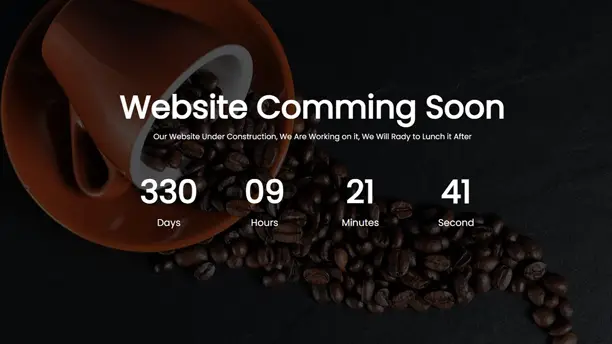
<h2>Website Comming Soon</h2>
<p>
Our Website Under Construction, We are Working on it, we will read to
lunch it after
</p>
<div class="counters">
<div class="time">
<span id="days" class="numbers">00</span>
<span>Days</span>
</div>
<div class="time">
<span id="hours" class="numbers">00</span>
<span>Hours</span>
</div>
<div class="time">
<span id="minutes" class="numbers">00</span>
<span>Minutes</span>
</div>
<div class="time">
<span id="seconds" class="numbers">00</span>
<span>Seconds</span>
</div>
</div>
</div>
</header>
<script src="js/script.js"></script>
</body>
</html>
@import url("https://fonts.googleapis.com/css2?family=Poppins&family=Roboto&display=swap");

* {
  padding: 0;
  margin: 0;
  box-sizing: border-box;
  font-family: "poppins";
}

header {
  background: url("../img/bg.jpg") no-repeat center center/cover;
  min-height: 100vh;
  position: relative;
  z-index: -1;
}

header::before {
  position: absolute;
  content: "";
  background: rgba(0, 0, 0, 0.7);
  top: 0;
  left: 0;
  width: 100%;
  height: 100%;
  z-index: -1;
}

.out_side_content {
  display: flex;
  align-items: center;
  flex-direction: column;
  justify-content: center;
  height: 100vh;
  color: #fff;
  text-align: center;
  padding: 2rem;
}

.out_side_content h2 {
  font-size: 5rem;
}

.out_side_content p {
  font-size: 1.2rem;
}

.counters {
  display: grid;
  grid-template-columns: repeat(4, 1fr);
  color: #fff;
  grid-gap: 2rem;
  margin: 2rem 0;
  font-size: 1.5rem;
}

.counters span {
  display: block;
}

.time {
  padding: 2rem;
}

.numbers {
  font-size: 5rem;
  font-weight: 800;
}

@media (max-width: 768px) {
  .out_side_content h2 {
    font-size: 3rem;
  }

  .out_side_content p {
    font-size: 1rem;
  }

  .counters {
    display: grid;
    grid-template-columns: repeat(2, 1fr);
    color: #fff;
    grid-gap: 1rem;
    margin: 1rem 0;
  }

  .numbers {
    font-size: 3.5rem;
    font-weight: 800;
  }
}
Adding a Countdown Timer
A great way to make your coming soon page stand out is by adding a countdown timer. This will create a sense of urgency and anticipation for your website launch, encouraging people to come back at launch date. With HTML, this is easy to accomplish, as there are several readily available JavaScript-based widgets you can add to your page.
Before adding a countdown timer, you’ll have to have an idea of when exactly you are launching your website and what time zone you need the timer to count down in. You’ll also want to adjust the text surrounding the timer if needed.
Once all of those details are taken care of, it’s simply a matter of choosing the right timed based on any other features you’d like it to include, pasting in the code into your HTML page and adjusting it according to the instructions provided with the code snippet.
let days = document.querySelector("#days");
let hour = document.querySelector("#hours");
let minutes = document.querySelector("#minutes");
let second = document.querySelector("#seconds");

let newyear = new Date("Jan 1, 2024 00:00:00").getTime();

updatecountdown();

function updatecountdown() {
  let now = new Date().getTime();
  let downtime = newyear - now;

  let seconds = 1000;
  let minute = seconds * 60;
  let hours = minute * 60;
  let day = hours * 24;

  let d = Math.floor(downtime / day);
  let h = Math.floor((downtime % day) / hours);
  let m = Math.floor((downtime % hours) / minute);
  let s = Math.floor((downtime % minute) / seconds);

  if (h < 10) {
    h = "0" + h;
  }

  if (m < 10) {
    m = "0" + m;
  }

  if (s < 10) {
    s = "0" + s;
  }

  days.innerHTML = d;
  hour.innerHTML = h;
  minutes.innerHTML = m;
  second.innerHTML = s;

  if (newyear == Date("Jan 1, 2024 00:00:00")) {
    setInterval();
  }

  setTimeout(updatecountdown, 1000);
}
Adding Sign-Up Forms
Once you have built the layout of your coming soon website and added content, you can start to add sign-up forms to enable visitors to register and receive updates on the launch of your project. To add a sign-up form, you will need access to a web hosting account with a web server and an email marketing service such as MailChimp.
You May Also Like:
- How to Make a Portfolio Website Using HTML and CSS
- Best VS Code Extensions For HTML and CSS
- How to Make Digital Clock Using JavaScript
- How to Make Password Generator in JavaScript
First, create a sign-up form using HTML, CSS, and JavaScript that allows visitors to enter their name and email address so that they will be added to your MailChimp list. You can also embed additional fields within this form such as Telephone Number or Address if you want additional information from visitors. After creating your form, upload it onto your server so that it is accessible via web browsers. If you are unfamiliar with coding HTML forms or uploading files onto servers, consider hiring an experienced web developer for assistance.
Next, link your HTML form to the corresponding MailChimp list by utilizing the instructions provided directly from MailChimp. This involves setting up an API Key in order to securely connect them together and then creating a new List on MailChimp which corresponds with the sign-up form fields created in HTML. Once correctly setup, test the connection by submitting information via the HTML registration form – this should then appear within the corresponding List in MailChimp following successful integration! Finally publish your coming soon website online so that it is live for prospective customers to view and use!
Adding Social Media Links
Adding social media links to your Coming Soon page is a great way to start building your online presence, allowing visitors to easily access your profile pages and follow you on other platforms.
First, you’ll need to create accounts on the social media platforms that you want to use. Make sure to have an attractive profile picture, clear and concise descriptions of yourself and/or your business, and accurate contact information. Once your accounts are set up, you can add a number of different options for visitors to connect with you.
For example, you can offer direct links to each of the profiles or embed buttons that link directly back the corresponding profile page. You can also include widgets or embeddable content (such as YouTube videos) which will give your Coming Soon page more interactivity. Finally, don’t forget to add share and follow buttons so that visitors can easily spread the word about your site!
Testing and Launching the Website
Once you have your coming soon page ready to go, it’s time to make sure everything is working correctly. Test all the links and make sure that the design looks and behaves as expected, for both desktop and mobile devices.
You may also want to use a tool such as Google Analytics or HotJar to monitor and analyze user behavior on the coming soon page. This will help you gauge interest in your product ahead of its launch and can give you valuable insights from feedback collected from visitors.
Now you are almost ready to launch your site! Just be sure to double check one more time that all forms, links, images, email subsriptons and social media sharing buttons are working properly. Once everything is finalized, it’s time to take the plunge and hit the publish button!
From here on out it’s just a case of keeping eyes open for any bugs in need of fixing or features that need tweaking once you go live with your website–and getting ready for success!
Conclusion
How to Create a Coming Soon Website in HTML page for your website can be a very rewarding experience. It is an excellent way to let people know about upcoming projects and can help boost excitement both internally and externally about what you have in the works.
With the right HTML code, you can easily customize your message and background elements, set release dates, link to social media accounts, upload logos, and much more. Utilizing a coming soon page enables you to showcase an upcoming event or product in anticipation of its launch date.
Once your “coming soon” page is complete and if you plan to launch it publicly online or even just send it out as an email attachment – be sure to double-check all aspects of the page for clarity for yourself and for those who stumble upon it. This can help ensure that everyone viewing the page has a great user experience so potential fans are already excited when the project launches!


